We were instructed to begin to apply our base knowledge about the Arduino coding language and capabilities to sciborg robots.
S. O. S. and Functions in Arduino:
before beginning to build or program our sciborg, we had to first figure out how to create a function within arduino so that we don't have to rewrite entire sections of code each time we want our sciborg to perform a task.
This particular program shown above creates and defines the functions dot() and dash() in order to create a simpler pattern that is easily discernible. In this case, the dot() and dash() functions are combined to create the classic S.O.S pattern from Morse Code.
Building Frank (the Sciborg):
Most of the Sciborg was already built, all we had to do was solder the wires for the battery pack and add that to the board along with our arduino and the Bricktronics LEGO shield.
Programming Frank:
Task #1: Open and modify Bricktronics "Single Motor" sketch
The sketch below shows the unmodified single motor program provided by Bricktronics. It names the motor m then establishes the rate at which the computer can communicate with the motor. In this case serial.begin(115200) indicates that the rate will be 115200 bps. further down in the code the program tells the motor to move forward then backward at varying speeds.
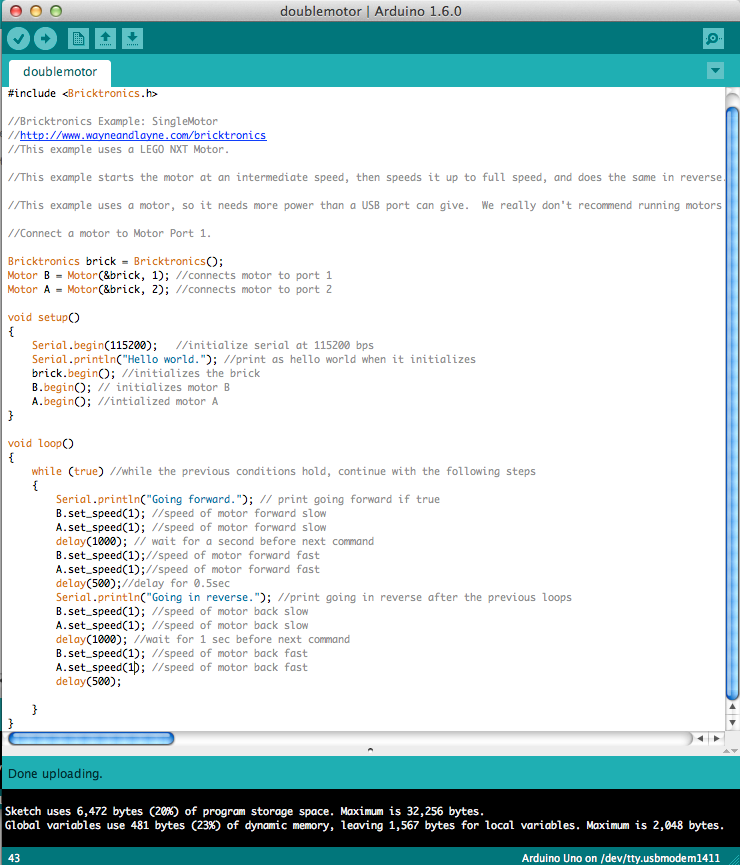
Next we modified the code to include two motors. We also changed the names of the motors to be motor A and motor B which mimics the labeling found on the sciborg.
Task #2:What is the minimum speed the motors will run at
Next we altered the code in order to find out the minimum speed required to get the motor to turn the wheel when it is in contact with the ground. In the sketch below we changed the speed to 0 in order to make sure we understood the speed function correctly before proceeding.
Although we were certain that a speed of 1 would not be enough to make the motor turn even if the wheel was not bearing the weight of the sciborg. As we predicted the wheel did not turn.
After playing around with the numbers, we found that the absolute minimum speed required to make the sciborg wheels move while bearing the weight of the sciborg was around 57. This is with only going straight. I imagine that a larger minimum speed would be needed if additional friction and torque was put on the motor and axel from turning.
Task #3:Hard turn
The first time we wrote the program we simply made one speed negative and the other positive. The resulting motion was for the sciborg to turn with its center of motion being in the middle of the axle. we also found that if one wheel was 0 while the other was 100 then the sciborg would make a hard turn, but this time the center of rotation was the wheel that had a speed of 0.
Task #4: Gentle turn
Next we changed the program, making one wheel have a speed of 150 and the other a speed of 100. This allowed the sciborg to make a gentle turn since both wheels were turning, just at slightly different speeds.
Task #5: Travel 10 feet and stop
In order to figure out a code to make the sciborg stop at 10 ft, we timed the sciborg traveling 2 meters. We then used the mathematical relationship that states that distance = (speed)(time) to figure out how long we needed the program to delay for, Note that the speed we entered was the speed actually measured when we timed the sciborg, not the speed found in the code.
Task #6: Drive Straight
We found that the sciborg drives straight if the front wheel which is not propelled by a motor is oriented straight. Also, if the sciborg's speed is negative it actually drives straighter than if it is positive. i think that this difference has to do with the structural mechanics of the non-motorized wheel.
Task #7:Motor button sensor
The button sensor uses a feature called "debounce" this feature is needed to help the sensor function properly. It forces the program to check whether or not the button was actually pressed within a short time period. If it was not used then, a single press could be seen as more than one confusing the program.
The task at hand was to make the sciborg respond to the button touch sensor if it is pressed, by stopping, moving backwards in a straight line, then turning before going forward again. Initially, we had trouble getting the sciborg to move backwards in a straight line due to the non-motorized wheel in the front of the sciborg which is attached to a rotating bearing. Our initial code is shown below.
We altered the code to account for the front wheel. We did this by first observing which wheel it favored to turn, then we rewrote the code so that the sciborg could quickly correct itself before moving backwards in a straight line before turning. Our first attempt to correct the wheel,shown below, was unsuccessful because we over corrected.
.
The difference needed to correct the wheel proved to be very small. It only needed a difference of .99 in order to correct the front wheel at the proper angle to move backward in a straight line,
Reflection:
I think that the biggest thing that I took away from the tasks in this set, was that realities concerning the design and structure of a device must be taken into an account when writing a code. We cannot simply assume that the program will function within a perfect world. We also must expect that unexpected problems will arise due to these imperfections.


The reality of the device are super important, I agree. For example, no matter how much we program the sciborg, we just have to accept that it will rarely go perfectly straight, as frustrating as that is.
ReplyDelete