Tuesday, April 14, 2015

MATLAB Day 2:Thermal Systems

The Assignment:
In class today we explored MATLAB further by altering mathematical models of thermal systems. The selected exercises are shown below.

Question 1: How does the cooling behavior change if we vary the parameters Rth and C?
Before increasing anything the graph looked like this with values of C=1000 and Rth=0.85...

If we increased C then the resulting graph looks like this...

If we increase Rth then the resulting graph looks like this...

If both C and Rth are increased then the graph looks like this


If we decrease C then the resulting graph looks like this...

If we decrease Rth then the resulting graph looks like this...

If both C and Rth are decreased then the resulting graph looks like this...

Based on the way the graphs above behaved Rth and C seem to make the slope more positive and more linear when increased. This makes sense intuitively because C is capacitance or the amount of heat it can hold, Rth is the thermal resistance so if the resistance is increased then the heat does not escape as easily. In both cases the heat is retained longer. When either C of Rth are decreased the function decays even more exponentially. Mathematically the expression...
Which can be rearranged to include Rth and C as shown below shows that these observations are grounded in the mathematical properties of the function...

Question 2: Calculate the value for P if we want our coffee to heat up to the Starbucks ideal 84 C.
Using the equation given in the text we were able to find P by setting dT equal to zero since as the function approaches the temperature we want, in this case 84 C (357 K) dT will approach zero. We can then simplify the expression and plug in the correct numbers.
The Code which implements this power value and the resulting graph are shown below...


Page 9: Bang-Bang and Proportional Control of Thermal Systems

1. Modify the program to stimulate a temperature controller using bang-bang control to reach the temperature. Why is bang-bang control appropriate for many thermal systems? Why might it be insufficient?

The original heatsim program is shown below...

In order to create a bang bang control system we altered the code so that if the temperature reahced the target then the power would turn off completely. If the the temperature was lower than the target then the power would turn completely on. The altered code and the resulting graph are shown below...

As you can see from the graph, once the temperature reaches the target then the power will turn on and off completely to make it oscillate sharply around the target. Bang bang control like this is common in heating systems because it allows the heater to reach the target quickly. With proportional control the temperature can never mathematically reach the target, and it takes much longer to get to a close approximation. 

2. Create a program that uses proportional control to reach and maintain the desired temperature. How does this approach compare to bang-bang control?

Our proportional control program actually reached the target faster than the bang bang control program, but that was only because the power used in the proportional program was much higher and most likely unrealistic for a real device. When we ran the program with the same power as the bang bang control it never even got close to the target within the time window, Mathematically the temperature can never reach the target because there is an asymptote. Our code and graph are shown below...


3. Modify both programs to add a sensor delay to both programs. What is the impact of this "sensor delay" on each system? What other delay(s) might you expect in your thermodynamic system, apart from sensor delays?

Shown below is the modified proportional delay program to include a sensor delay of 5 seconds. This forces the temperature to actually surpass the target temperature because by the time the program senses that the temperature has exceeded the target, the temperature has continued to rise for 5 seconds. After this the program will respond causing it to pull the temperature back down. In this way it will continue to oscillate with an increasingly subtle curve towards infinity,

The modified heatsim_banbang program to include a delay shown below changes the program by increasing the amount of time that passes before the heater is turned back on all the way to reach the target. This would prevent the heater from turning on and off too quickly preventing mechanical malfunctions that could occur as a result.

As for other forms of delays. I would say that there could be an action delay which rather than delaying how often the sensor reads the information, delaying the response to that reading. In this way the sensor would constantly be reading but the action for a given kind of stimuli would not occur until 5 seconds after the stimuli occurred if the delay was 5 seconds.

Reflection:
This set of problems really helped to ground the concept of bang bang and proportional control for me since I now have graphical/visual references for their effects. Moving forward this knowledge will be very helpful when trying to incorporate bang bang and proportional control into my final project.

Friday, April 10, 2015

MATLAB Introduction

The Assignment: 
For this assignment we read through the 1st 4 chapters of the Allen Downey's book Physical Modeling in MATLAB and completed selected exercise contained in those chapters.

Exercise 2.1: fibonacci1 script
For this first exercise we had to transform a Fibonacci sequence equation into a language that could be understood by the program. We also had to make sure that the program updated itself. We separated the equation into a part 1 (P1) and part 2 (P2) to make it easier to read.


Exercise 2.3: car_update script
For this excercise we were given a word problem which was about a car rental company with two locations, one in Boston and the other in Albany. Customers could rent cars one way, which meant that the number of cars at each location would fluctuate over time until it reached an equilibrium. Initially we had trouble making sure that the a (Albany) and b (Boston) values wouldn't update before the program had run through. This made the values only slightly off, and would have been unnoticeable if the round function had been there originally.  We fixed this by creating anew and bnew within the program then updating them at the end.

Exercise 3.1: car_loop script
With the previous script if we wanted it to run 52 times then we would have had to tell it to run over and over again 52 time. By creating a loop the program automatically runs the script 52 times then gives us the answer.

Exercise 3.2: car_loop script with plotting (also try values of a&b = 10000)
Next we plotted the car_update function we created earlier. The first time we wrote the program we wrote car_loop rather than car_update inside the for statement and the function wouldn't work. This was because we created a double loop that didn't reference our original program. Changing it to car_update gave us the correct graph.

Below is what the plot looks like if a&b = 10000 initially. Notice how smooth the curve is compared to the one above.

Exercise 3.5: fibonacci2 sequence script
WE rewrote the fibonacci sequence without all the cumbersome language we used in exercise 2.1. The range i=3:10 starts at 3 becasue if it started at 2 then the program would get stuck since f(i-2) = 0.


Exercise 4.6: plotting fibonacci ratios
We changed he f to an F to conform to the conventions of vector notation which the book talked about. we also moved the ans line out of the loop. We also created a range that has a upper limit equal to n.

Plotting the ratio proved to be very difficult. We got the golden ratio that the ration is supposed to approach, but it wouldn't plot it consecutively instead there would only be a dot in the center of the plot for the answer. Also, if we tried to plot F then it gave us the fibonacci sequence exponential curve. We addressed this problem by creating another function Y to stand for the ration. We then told it to plot Y(n) rather than Y(i) which finally gave us a fully plotted graph.

Reflection:
I found that while reading the book the operations seemed to be logical and easily applicable, however once we started trying to write code for ourselves it became difficult. AS he mentions many times throughout the first 4 chapters, often it is difficult to tell whether or not the code is executing properly or not. With the Fibonacci sequence we found ourselves having to do the math ourselves to check if it was running correctly. Also, the programming language is not terribly intuitive so we need to be especially careful about which signs and symbols we use.

Thursday, April 9, 2015

Final Project Ideas

Assignment: 
In class today we observed children of two different age groups in order to brainstorm ideas for our final project that would enhance the experience of the children and their teachers while utilizing all of the skills we have learned thus far in the class, including  feedback and control methods we have been working with these past few weeks.

My Observations:
Since we only were able to observe the children for a shorter period of time I wasn't able to truly get a sense of the needs of the students and their teachers. However, the things I did notice are listed below.

  • Only a certain number of children were allowed to play on a certain object at one time.
  • Some kids wanted to jump from activity to activity without cleaning up after themselves
  • A few of the kids got out too many toys and lost track of all of them
  • The teacher had to remind the children to keep the volume down
  • A few of the kids playing in the tree house-like structure threw toys off of the top through the bars. 

Teachers Suggestions:
I found the teacher's suggestions to be very useful for generating ideas since she has a more intimate knowledge of the dynamics of the class room. Her suggestions of problems to address and other important information is listed below.

  • The children are very fidgety and won't stay on their carpet squares
  • The children are not able to see out of the window downstairs
  • The kids sometimes put things in between the cracks of the cabinets and the wall 
  • They often get very loud while playing and the teacher has to constantly remind them to quiet down
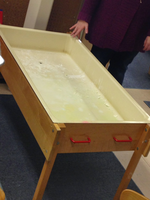
  • The children get so involved in playing with the water and sand tables that they don't realize that the sand and water is getting all over the floor
  • The bathroom toilet flushes very loudly and scares some of the children
  • The bathroom locks are confusing to the children and sometimes they are unable to get them open
  • The children often forget to flush the toilet or wash their hands
  • Sometimes they leave the water faucet running
  • They often take more than one paper towel or piece of toilet paper

The teacher also brought to our attention some things to keep in mind after her years as a teacher about the nature of children and how that relates to our projects.
  • Ideas need to be reinforced through different senses such as sight and hearing for the children to understand and remember
  • Ideas need to be repeated
  • Feedback should be positive when possible
  • We need to make sure that the signal that our device is not so interesting that it distracts, scares or encourages the children to do the thing which we are trying to prevent.
  • Educational devices are highly encouraged
  • There are certain size parameters that they must abide by in order to follow safety laws
  • With safety in mind, they encourage the children to engage in "risky play" which allows them to test and realize their limits

Problems/Ideas of Interest

  1. Carpet Squares: As a child I was very fidgety and had a lot of trouble sitting on my carpet square, for that reason this problem interests me. The most obvious place to start with this problem it seams to be is with a touch sensor that knows when the child is or is not sitting on their carpet square 
  2. Washing their hands: Hygiene and cleanliness is of vital importance to make sure that the children and teachers stay healthy. For this reason implementing a device that helps the children remember how long to wash their hands for and remind them to  
  3. Noise level: Some sort of noise sensor would need to be implemented that would go off either by lighting up or some other signal. The challenge with this is to make sure the signal is not too exciting to encourage the noise or conversely to scare them. Also, there needs to be a clear correlation between the sound and the noise level that can be understood by the kids.
  4. "Risky Play": I was intrigued by the idea of "risky play" but I am unsure how that could be implemented given our parameters


Reflection:
It was surprising that the teachers have chosen to purposefully limit the children's interaction with technology in the class room. I find their reasoning compelling and tend to agree for the most part that children need to be in charge of their own play and interact with the world without a screen. Seeing as the teachers are allowing us to build new electronic devices for their classroom, they are not completely against technology, rather they encourage a healthy balance. It is important to me in this design to make sure that our goals for the design align as best they can with the educational philosophy of the teacher.

Friday, April 3, 2015

Arduino Day 4: More Adventures with Frank

The Assignment:
Our challenge was to

Encoders:
The encoder is a sensor which is located inside of the Lego motor. It measures the number of times the shaft has rotated. This can be very useful in describing the position of the sciborg when trying communicate that to the code. Below is the base code that runs the encoder. When the arduino software reads the code it begins at 0 because the shaft has not rotated. As the shaft rotates the number read by the encoder becomes increasingly negative. The magnitude of the number shows the number of times it has rotated since the beginning position marked by 0.


The version below has better comments

Touch Switch:
The touch switch sensor is located on the arm of the sciborg. It is similar to the Lego button sensor explored in the the previous post, but due to its design it is generally more effective in stopping when it encounters an object. This is because the Lego button sensor is very small and is often not positioned at the appropriate angle to ensure that the obstacle pushes the button. The arm covers a larger vertical space in front of the sciborg. A sample code for this sensor is also pictured below.


In this example code, the LED light stays on forever after the button is pushed because the code never resets itself to receive any other input after the first time. We altered the code so that it would only turn on when the button was being pressed. The video and code are shown below.


Ultrasonic Sensor:
In my opinion, the ultrasonic sensor is the coolest sensor we have used thus far. It works in the same way that a bat uses echolocation to project a small sound wave that is then bounced back to the sensor. The distance that the sensor reads is dependent on how quickly the wave returns to the sensor. The sample code is shown below. We found that it's range is from about 6 to 280 as measured by our tests; that translates to about a distance of 2.5 - 3 meters. The sensor is most accurate to large flat objects such as a wall or board, although it is capable of picking up other objects as you will see later on in this post. The accuracy of the sensor is also affected by the periphery. We found during tests that after calibrating the sensor by pointing it into open space, that sometimes it would pick up us or the walls when we were on the outskirts of its field.

Feedback & control Activities:
Encoders: Fixed distance, bang bang control
In this activity we had to use the encoder sensors in the motor to tell the arduino to stop after 10 ft. At first we misinterpreted the challenge by assuming that the number of turns of the wheel corresponded directly to the number of the turns of the shaft. This however is not the case. Once that confusion was sorted out though, we were able to write a code that accomplished what we wanted it to. Our original 10 ft code is directly below and the improved encoder bang bang code is under that.


Button Sensor: Fixed distance, bang bang control
Next we used the button sensor to make Frank travel 10 ft then stop. We just altered the code we wrote earlier for the button sensor slightly. In order for this code to work though there needs to be an obstacle to at the 10 ft mark to push the button sensor.


Ultrasonic Sensor: Fixed distance, bang bang control
Next we wrote a code that would make Frank travel forward until he sensed something close enough in his path as measured by the ultrasonic sensor. We had a lot of trouble initially writing this code because the ultrasonic sensor wouldn't run while the motor was running. We found that the solution was simply to change the while to an if statement.

We then used this code to create a konga line code that relied on bang bang control


Encoder: Fixed Distance, Proportional Control
Our next challenge was to alter the codes so that they were proportional control rather than bang bang. proportional control allows us to gradually slow down the motor based on the input from the various sensor rather than just turning off the motor entirely. In order to do this we had to understand that proportional control must be written in terms of output=error*gain where output=(goal - measurement)*gain. Once this was explained to us we were able to write a code using proportional control.

Ultrasonic: Fixed Distance, Proportional Control...KONGA LINE!!!
The ultrasonic proportional code is written so that if the object in front of it is within a certain range picked up by the ultrasonic sensor then the motor's speed increases, but if it it is too close then a bang bang control back up is implemented to make sure the car does not run into the car in front of it a konga line is.

Reflection: 
After this project I feel that I have gained a better understanding of the coding language which I think will serve me well as I begin to consider the problems related to my final project. That being said, there is so much that I have yet to understand fully about the coding language, so it will continue to be a challenge to work with it.

Sunday, March 15, 2015

Arduino Day 3 (Bricktronics)

The Assignment:
We were instructed to begin to apply our base knowledge about the Arduino coding language and capabilities to sciborg robots.

S. O. S. and Functions in Arduino:
before beginning to build or program our sciborg, we had to first figure out how to create a function within arduino so that we don't have to rewrite entire sections of code each time we want our sciborg to perform a task.
This particular program shown above creates and defines the functions dot() and dash() in order to create a simpler pattern that is easily discernible. In this case, the dot() and dash() functions are combined to create the classic S.O.S pattern from Morse Code. 


Building Frank (the Sciborg):
Most of the Sciborg was already built, all we had to do was solder the wires for the battery pack and add that to the board along with our arduino and the Bricktronics LEGO  shield.

Programming Frank:
Task #1: Open and modify Bricktronics "Single Motor" sketch

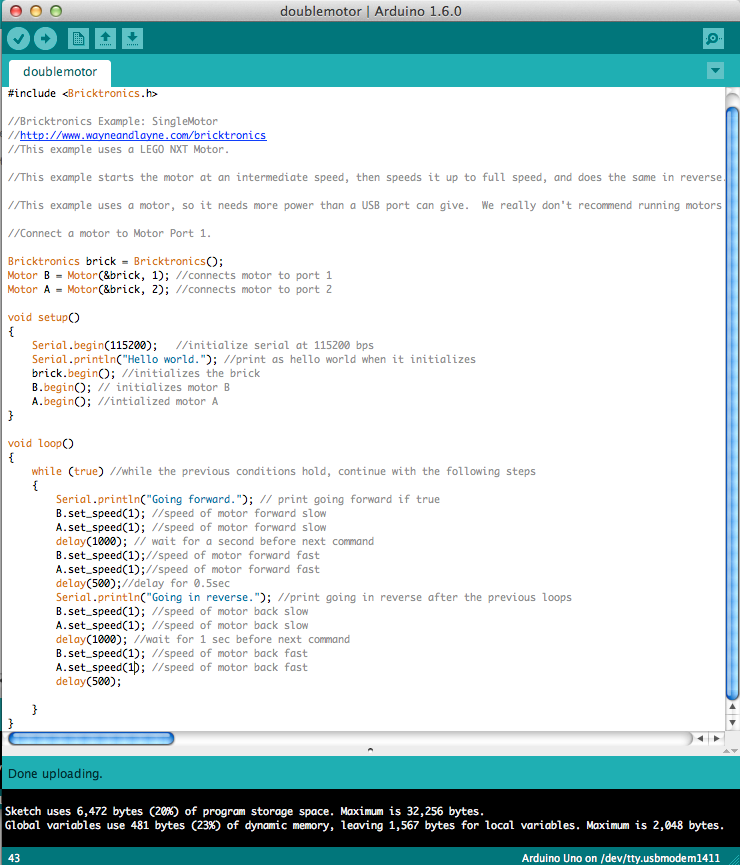
The sketch below shows the unmodified single motor program provided by Bricktronics. It names the motor m then establishes the rate at which the computer can communicate with the motor. In this case serial.begin(115200) indicates that the rate will be 115200 bps. further down in the code the program tells the motor to move forward then backward at varying speeds.

Next we modified the code to include two motors. We also changed the names of the motors to be motor A and motor B which mimics the labeling found on the sciborg.


Task #2:What is the minimum speed the motors will run at

Next we altered the code in order to find out the minimum speed required to get the motor to turn the wheel when it is in contact with the ground. In the sketch below we changed the speed to 0 in order to make sure we understood the speed function correctly before proceeding.

Although we were certain that a speed of 1 would not be enough to make the motor turn even if the wheel was not bearing the weight of the sciborg. As we predicted the wheel did not turn.

After playing around with the numbers, we found that the absolute minimum speed required to make the sciborg wheels move while bearing the weight of the sciborg was around 57. This is with only going straight. I imagine that a larger minimum speed would be needed if additional friction and torque was put on the motor and axel from turning.

Task #3:Hard turn
The first time we wrote the program we simply made one speed negative and the other positive. The resulting motion was for the sciborg to turn with its center of motion being in the middle of the axle. we also found that if one wheel was 0 while the other was 100 then the sciborg would make a hard turn, but this time the center of rotation was the wheel that had a speed of 0.

Task #4: Gentle turn
 Next we changed the program, making one wheel have a speed of 150 and the other a speed of 100. This allowed the sciborg to make a gentle turn since both wheels were turning, just at slightly different speeds.


Task #5: Travel 10 feet and stop
In order to figure out a code to make the sciborg stop at 10 ft, we timed the sciborg traveling 2 meters. We then used the mathematical relationship that states that distance = (speed)(time) to figure out how long we needed the program to delay for, Note that the speed we entered was the speed actually measured when we timed the sciborg, not the speed found in the code.


Task #6: Drive Straight
We found that the sciborg drives straight if the front wheel which is not propelled by a motor is oriented straight. Also, if the sciborg's speed is negative it actually drives straighter than if it is positive. i think that this difference has to do with the structural mechanics of the non-motorized wheel.

Task #7:Motor button sensor
The button sensor uses a feature called "debounce" this feature is needed to help the sensor function properly. It forces the program to check whether or not the button was actually pressed within a short time period. If it was not used then, a single press could be seen as more than one confusing the program.

The task at hand was to make the sciborg respond to the button touch sensor if it is pressed, by stopping, moving backwards in a straight line, then turning before going forward again. Initially, we had trouble getting the sciborg to move backwards in a straight line due to the non-motorized wheel in the front of the sciborg which is attached to a rotating bearing. Our initial code is shown below.


We altered the code to account for the front wheel. We did this by first observing which wheel it favored to turn, then we rewrote the code so that the sciborg could quickly correct itself before moving backwards in a straight line before turning. Our first attempt to correct the wheel,shown below, was unsuccessful because we over corrected.
.


The difference needed to correct the wheel proved to be very small. It only needed a difference of .99 in order to correct the front wheel at the proper angle to move backward in a straight line, 


Reflection:
I think that the biggest thing that I took away from the tasks in this set, was that realities concerning the design and structure of a device must be taken into an account when writing a code. We cannot simply assume that the program will function within a perfect world. We also must expect that unexpected problems will arise due to these imperfections.